How to Make a Homemade Dab Rig: A Step-by-Step Guide
Crafting Your Own Homemade Dab Rig: The Ultimate DIY Experience
In the world of cannabis consumption, dabbing has become increasingly popular for its potent and flavorful experience. Dabbing involves vaporizing concentrates like wax or shatter using a specialized device called a dab rig. While purchasing a dab rig is an option, learning how to make a homemade dab rig can be a rewarding and cost-effective endeavor. In this comprehensive guide on how to make a homemade dab rig, we'll walk you through the steps of creating your very own homemade dab rig, providing both practical instructions and safety tips along the way. Now let's get into how to make a homemade dab rig...
Understanding the Basics of Dab Rigs
Before diving into the DIY process, it's essential to understand the basic components of a dab rig. A traditional dab rig consists of several key elements:
- Glass Piece: Typically, dab rigs are made from heat-resistant borosilicate glass. This glass piece serves as the main chamber for vaporizing concentrates.
- Nail or Banger: The nail or banger is the part of the rig where the concentrate is heated. It's usually made from quartz, titanium, or ceramic.
- Dome or Carb Cap: This optional accessory helps regulate airflow and trap heat, ensuring efficient vaporization of the concentrate.
- Dabber: A dabber is a tool used to handle and apply concentrates onto the heated nail.
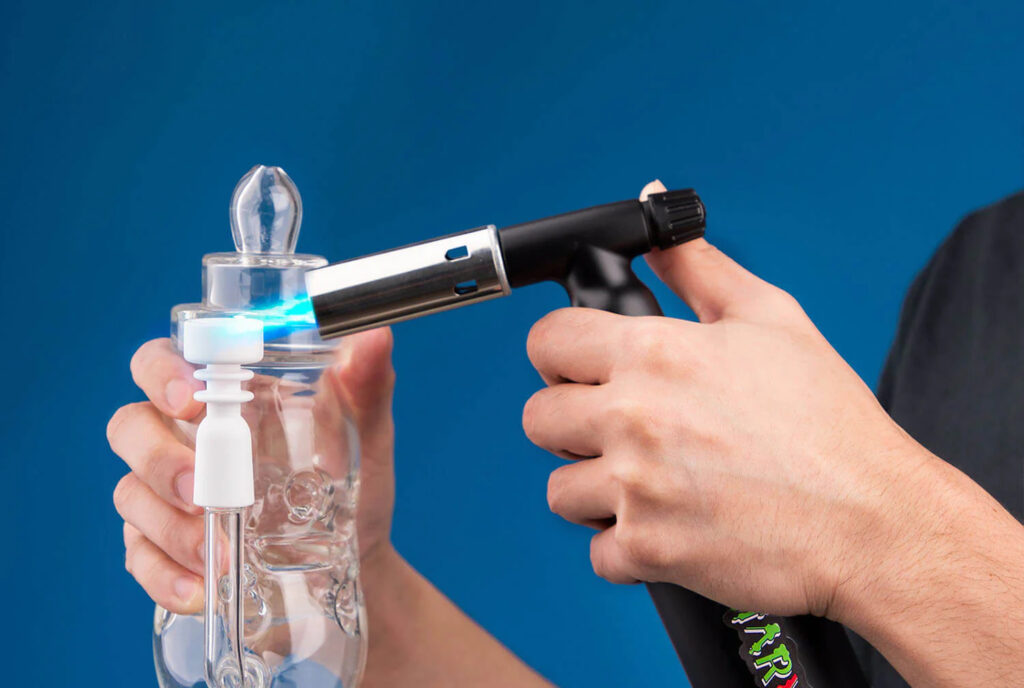
- Torch: To heat the nail, a torch is required. Butane torches are commonly used for this purpose.
Materials Needed for a Homemade Dab Rig
Now that you understand the basic components, let's gather the materials needed to craft your homemade dab rig:
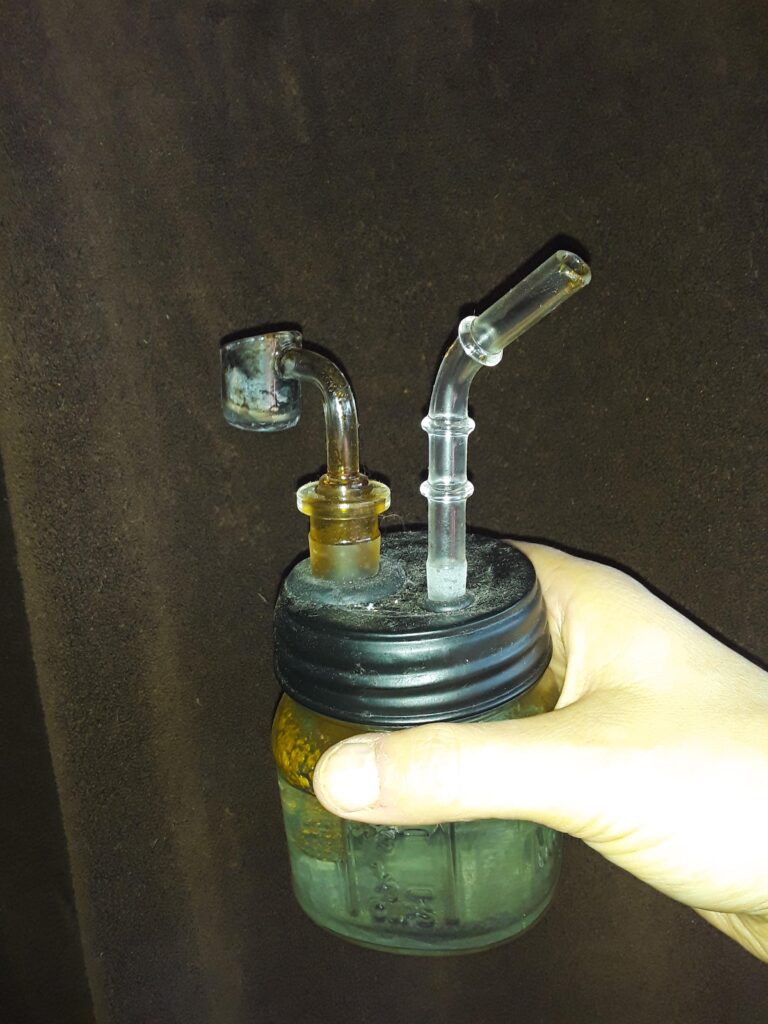
- Glass bottle or jar
- Glass drill bit (specifically designed for drilling into glass)
- Quartz, titanium, or ceramic nail
- Glass or metal downstem
- Rubber grommet or O-ring
- Butane torch
- Dabber
- Water
Step-by-Step Guide: How to Make a Homemade Dab Rig
Follow these steps carefully to create your homemade dab rig:
Step 1: Select a Suitable Glass Container
Choose a glass bottle or jar that will serve as the base of your dab rig. Ensure that it's made from thick, durable glass to withstand the heat from the torch.
Step 2: Drill a Hole for the Downstem
Using a glass drill bit, carefully drill a hole near the base of the glass container. This hole will accommodate the downstem, which connects the nail to the water chamber.
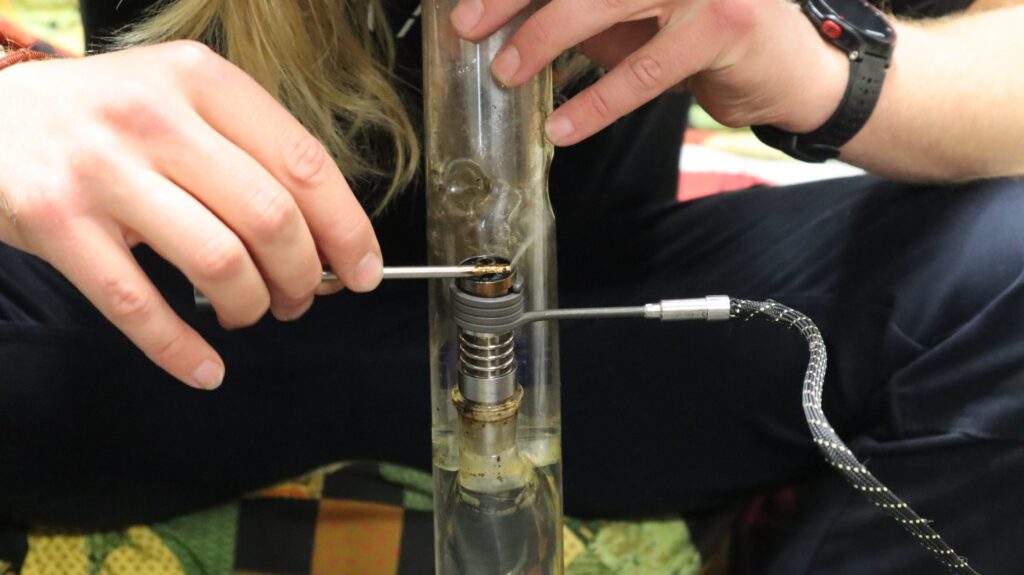
Step 3: Insert the Downstem
Insert the downstem into the hole you drilled, ensuring a snug fit. Use a rubber grommet or O-ring to create a tight seal between the glass and the downstem.
Step 4: Attach the Nail

Next, attach the quartz, titanium, or ceramic nail to the downstem. Make sure it's securely in place to prevent any leaks during use.
Step 5: Add Water to the Chamber
Fill the glass container with enough water to cover the bottom of the downstem. Be mindful not to overfill, as this can cause water to splash into the nail when dabbing.
Step 6: Heat the Nail
Using a butane torch, carefully heat the nail until it reaches the desired temperature. Allow it to cool for a few seconds to achieve the optimal dabbing temperature.
Step 7: Apply the Concentrate
Using a dabber, apply a small amount of concentrate onto the heated nail. The concentrate should vaporize instantly, producing a smooth and flavorful vapor.
Step 8: Inhale and Enjoy
Once the concentrate has vaporized, inhale slowly and steadily through the mouthpiece of your homemade dab rig. Enjoy the intense flavor and effects of your homemade creation.
Safety Tips for Homemade Dab Rigs
While crafting and using your homemade dab rig, it's crucial to prioritize safety. Follow these safety tips to ensure a safe dabbing experience:
- Always use thick, heat-resistant glass for your homemade dab rig to minimize the risk of breakage.
- Handle the butane torch with care and keep it away from flammable materials.
- Allow the nail to cool down completely before handling it to avoid burns.
- Use a stable surface to support your homemade dab rig during use to prevent accidental tipping or breakage.
Conclusion on How to Make a Homemade Dab Rig
Learning how to make a homemade dab rig can be a fun and rewarding DIY project for cannabis enthusiasts. By following this step-by-step guide on how to make a homemade dab rig and incorporating safety precautions, you can create your very own customized dabbing experience. Whether you're a seasoned dabber or new to the world of concentrates, a homemade dab rig offers a budget-friendly alternative to store-bought options, allowing you to enjoy the benefits of dabbing from the comfort of your own home.